https://www.microsoft.com/en-us/download/details.aspx?id=35460 


Download Microsoft Garage Mouse without Borders from Official Microsoft Download Center

Important! Selecting a language below will dynamically change the complete page content to that language. Download Mouse without Borders (http://aka.ms/mm) is a product that makes you the captain of your computer fleet by allowing you to control up to four

www.microsoft.com

마소에서 제공하는 소프트웨어 kvm 이다.

다운 받아서 설치하고 간단한 설정만 하면 된다.

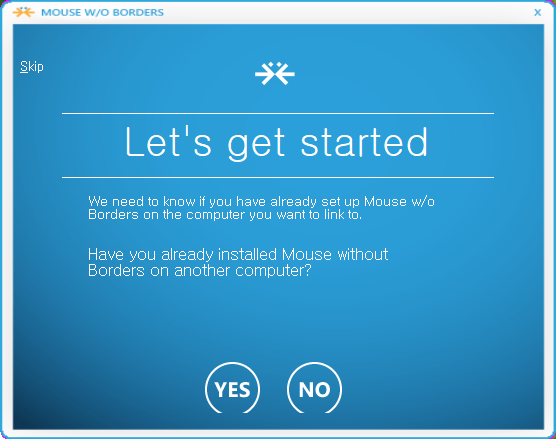
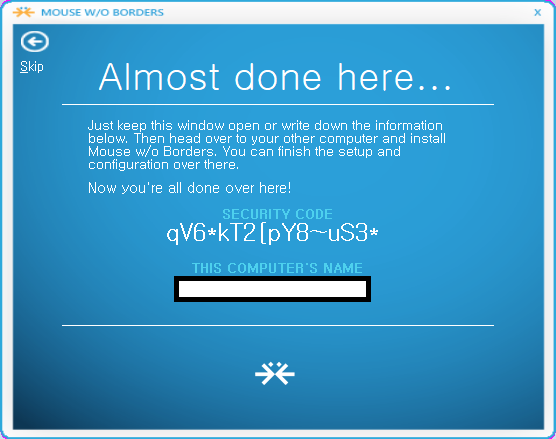
실행 후 호스트가 될 컴퓨터에서 NO 를 선택하면 접근 코드가 나온다.

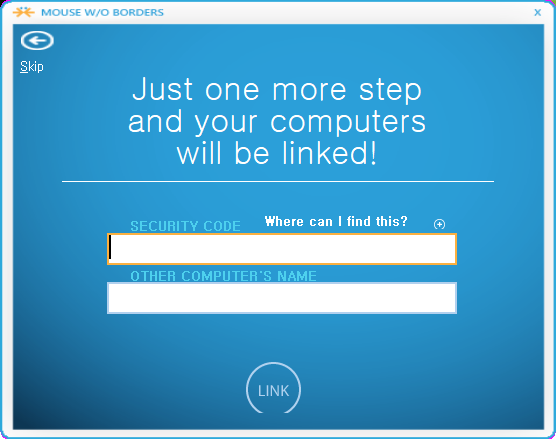
접속할 컴퓨터에서 프로그램 실행 후 접근 코드와 컴퓨터 이름을 입력하고 연결(LINK) 버튼을 누르면 된다.

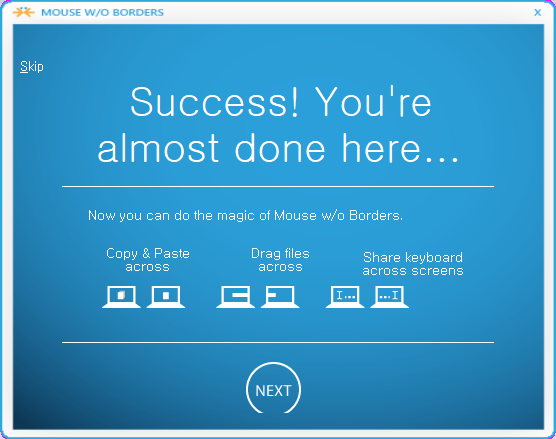
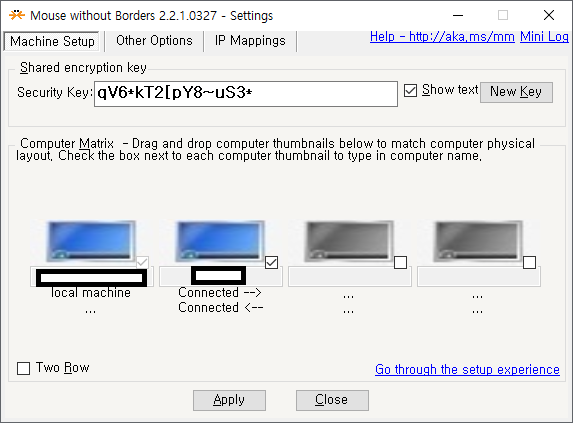
연결이 완료되면 연결된 장비로 키보드/마우스가 넘어가서 사용할 수 있다.

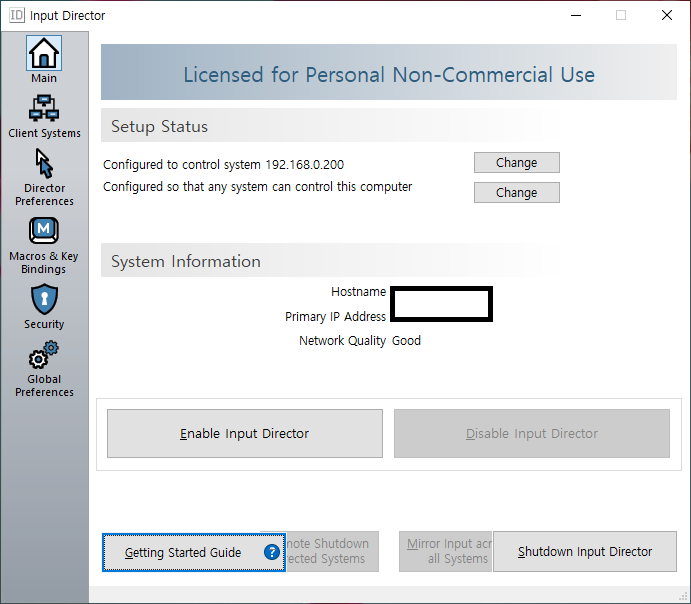
전에 사용하던 Input Director 가 UI 도 제대로 안 보이고 해서 넘어갈까 했는데 

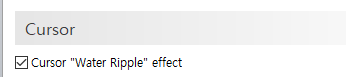
화면 이동시에 물결 효과 때문에 못 넘어가겠다. 

https://www.inputdirector.com/downloads.html


Input Director - Software KVM to Control Multiple Computers


www.inputdirector.com

아직까지는 Input Director 승

728x90

aws s3 에 대응하는 azure 서비스는 blob storage 인 것 같다.

https://azure.microsoft.com/en-us/features/storage-explorer/#overview


Azure Storage Explorer – cloud storage management | Microsoft Azure

Easily manage your Azure storage accounts in the cloud, from Windows, macOS, or Linux, using Azure Storage Explorer.

azure.microsoft.com

GUI 를 통해 접근하고 싶으면 Azure Storage Explorer 를 이용하면 된다.

https://docs.microsoft.com/ko-kr/cli/azure/install-azure-cli-windows?tabs=azure-cli 


Windows용 Azure CLI 설치

Windows에서 Azure CLI를 설치하려면 Windows 명령 프롬프트(CMD)를 통해 CLI에 대한 액세스 권한을 제공하는 MSI 설치 관리자 또는 Powershell을 사용해야 합니다.

docs.microsoft.com

배치 스크립트 작업을 위해서는 azure cli 가 필요하다.

https://docs.microsoft.com/ko-kr/cli/azure/storage/blob?view=azure-cli-latest


az storage blob

--> az storage blob 이 페이지가 도움이 되었나요? 구조화 되지 않은 데이터 (blob)의 개체 저장소를 관리 합니다. 명령에 대해 다음과 같은 인증 매개 변수 중 하나를 지정 하십시오.--auth-모드,--계정-

docs.microsoft.com

blob storage cli 는 "az storage blob" 으로 시작한다.

az storage blob <command> --account-name <account name> --account-key <account key>
SET AZURE_STORAGE_ACCOUNT=<account name>
SET AZURE_STORAGE_KEY=<account key>

접근법이 다양하게 있지만 <account name> 과 <account key> 를 발급받은 경우에는 cli 에 --acount-name 과 --account-key 를 붙이거나 환경변수로 설정하는 방법이 있다.

az storage blob list -c <container name> --query "[*].name"

컨테이너 내에 목록을 가져올 때는 list 명령어를 사용한다. 결과값이 json 형태로 return 되는데 --query <JMESPATH>를 이용해 원하는 결과값으로 필터링할 수 있다.

az storage blob download -c <container name> -f <local file name> -n <remote file name>
az storage blob download-batch -d <download path> -s <container name> --pattern <pattern>

하나만 가져올 때는 download 여러개 가져올 때는 download-batch 명령어를 사용한다. 컨테이너 명령인자가 download 는 '-c', download-batch 는 '-s' 로 다르다.

az storage blob upload -c <container name> -f <file name> -n "<remote file name>"
az storage blob upload-batch -d <container name> -s <source path> --destination-path <destination path>

단일 파일 업로드는 upload, 여러 파일 업로드는 upload-batch 명령어를 사용한다. upload-batch 사용시 --destination-path 를 지정하지 않으면 root 에 업로드 된다.

az storage blob delete -c <container name> -n <file name>
az storage blob delete-batch -s <container name> --pattern <pattern string>

단일 파일 삭제는 delete, 다중 파일 삭제는 delete-batch 명령어를 사용합니다.

728x90

코드 수정을 하다보면 여러 부분에 동시에 같은 문자열을 입력하고 싶을 때가 있다. 커서를 옮겨가며 붙여넣기를 할 수도 있지만 Visual Studio 는 다중 커서(Multi Caret) 를 지원한다.

에디터에서 Ctrl + Alt + 클릭을 하면 해당 위치에 커서가 추가된다.

여러 곳을 선택한 상태에서 문자열을 입력하면 같은 문자열이 입력된다. copy constructor 나 assignment operator 만들 때 같은 변수명을 입력해야하는 경우가 있는데 'this->' 같은 문자열 입력할 때 편하다.

참고 : Improving your productivity in the Visual Studio Editor


Improving your productivity in the Visual Studio Editor

Over the last few updates to Visual Studio 2017, we’ve been hard at work adding new features to boost your productivity while you’re writing code. Many of these are the result of your direct feedback coming from the UserVoice requests, Developer Commun

devblogs.microsoft.com


728x90

윈도우즈 배치 파일에서 오늘 날짜, 시간을 가져오려면 %date%, %time% 환경 변수를 사용하면 된다.

>echo %date%
2021-10-06
>echo %time%
14:22:52.76

설치된 윈도우즈의 로케일에 따라 결과 문자열이 다를 수 있다.

Azure 에 설치된 윈도우즈 서버에서 실행했을 때 다음과 같은 결과가 나왔다.

>echo %date%
Tue 10/05/2021

원하는 형식의 문자열을 얻으려면 powershell 로 DateTime api 를 이용하면 된다.

>powershell -Command [DateTime]::Now.ToString(\"yyyyMMdd_hhmmss\")
20211006_022824

>for /f "delims=" %a in ('powershell -Command [DateTime]::Now.ToString(\"yyyyMMdd_hhmmss\"^)') do @echo DateTime is: %a
DateTime is: 20211006_022911

utc 시간이나 어제 날짜 같은 문자열을 만들 때도 편리하다.

>for /f "delims=" %a in ('powershell -Command [DateTime]::UtcNow.ToString(\"yyyyMMdd_hhmmss\"^)') do @echo utc DateTime is: %a
utc DateTime is: 20211006_053039

>for /f "delims=" %a in ('powershell -Command [DateTime]::Now.AddDays(-1^).ToString(\"yyyyMMdd_hhmmss\"^)') do @echo yesterday is: %a
yesterday is: 20211005_023148

참고 : https://serverfault.com/questions/384718/how-to-create-a-yesterday-date-in-a-batch


How to create a yesterday date in a batch

copy \\server01\E$\LogFiles\IVR\bcR\??120428.* \\LBC\workgroup\cs\ftp\Team\bcR\ copy \\server02\E$\LogFiles\IVR\bcR\??120428.* \\LBC\workgroup\cs\ftp\Team\bcR\ copy \\server03\E$\LogFiles\IVR\bcR\??

serverfault.com

microsoft - 표준 날짜 및 시간 서식 문자열


표준 날짜 및 시간 서식 문자열

표준 날짜 및 시간 서식 문자열을 사용하여 .NET에서 날짜 및 시간 값의 텍스트 표현을 정의하는 방법을 알아봅니다.

docs.microsoft.com


728x90

윈도우에서 파일 복사할 때 xcopy 를 썼었는데 이제는 더 옵션이 많은 robocopy 를 사용하고 있다.

A svn 에서 B svn 으로 폴더를 동기화하고 싶을 때 /mir 과 /xd 옵션을 사용하고 있다.

/mir Mirrors a directory tree (equivalent to /e plus /purge). Using this option with the /e option and a destination directory, overwrites the destination directory security settings.
/xd <directory>[ ...] Excludes directories that match the specified names and paths.
robocopy svn_A svn_B /mir /xd .svn

참고 :

서버구축이야기!! - Windows(윈도우)에서 ROBOCOPY를 이용한 파일 백업, 일치화 하기


Windows(윈도우)에서 ROBOCOPY를 이용한 파일 백업, 일치화 하기

Windows(윈도우)에서 ROBOCOPY를 이용한 파일 백업, 일치화 하기 이번시간에는 Windows를 이용하시는분들을 위해 간편하게 파일을 백업, 일치화, 복사하는 도구를 알아보도록 하겠습니다 리눅스를 이

server-talk.tistory.com

Microsoft - robocopy


robocopy

Reference article for the robocopy command, which copies file data from one location to another.

docs.microsoft.com


728x90

svn checkout 이나 commit 하려고 할 때 SSL Certificate 관련된 오류가 발생할 때가 있다.

svn: E170013: Commit failed (details follow):
svn: E170013: Unable to connect to a repository at URL 'https://xxx.yyy.zzz.ddd/svn/trunk'
svn: E230001: Server SSL certificate verification failed: certificate issued for a different hostname

내부, 외부 ip 가 있고 내부에는 hostname 으로 접근 가능하게 설정했는데 외부에서 public ip 로 접근하려고 해서 발생했었다.

Error validating server certificate for 'https://xxx.yyy.zzz.ddd:ppp':
 - The certificate is not issued by a trusted authority. Use the
 fingerprint to validate the certificate manually!
 - The certificate hostname does not match.
 Certificate information:
 - Hostname: 
hostname.domain
 - Valid: from Jul 19 07:18:37 2021 GMT until Jul 17 07:18:37 2031 GMT
 - Issuer: 
hostname.domain
 - Fingerprint: FF:FF:FF:FF:FF:FF:FF:FF:FF:FF:FF:FF:FF:FF:FF:FF:FF:FF:FF:FF
 (R)eject, accept (t)emporarily or accept (p)ermanently?

interative mode 에서는 입력창에 p 를 입력해 accept 하면 되는데 jenkins 와 같은 자동화 툴에서는 문제가 된다.

이럴 때 svn cli option 중에 --trust-server-cert-failures 를 사용하면 된다. 

--non-interactive : do no interactive prompting (default is to prompt
only if standard input is a terminal device)
--trust-server-cert : deprecated; same as --trust-server-cert-failures=unknown-ca
--trust-server-cert-failures ARG : with --non-interactive, accept SSL server certificates with failures; ARG is comma-separated list of 'unknown-ca' (Unknown Authority), 'cn-mismatch' (Hostname mismatch), 'expired' (Expired certificate), 'not-yet-valid' (Not yet valid certificate) and 'other' (all other not separately classified certificate errors).

예전엔 --trust-server-cert 옵션만 있었는데 다양한 certificate 오류를 처리하기 위해 svn 1.9 에 --trust-server-cert-failures 가 추가되었다. 체크인이나 체크아웃 시에 --non-interactive 옵션과 함께 --trust-server-cert-failures 옵션을 추가해서 실행하면 된다.

svn ci . --non-interactive --trust-server-cert-failure="unknown-ca,cn-mismatch,expired,not-yet-valid,other"

참고 : https://stackoverflow.com/questions/5165516/server-certificate-verification-failed


Server certificate verification failed

When I execute svn in command line: command: svn commit path -m "Uploaded By User" --username username --password password --non-interactive --trust-server-cert --quiet 2>&1 This res...

stackoverflow.com


728x90

실행 프로그램 로그 추적할 때 tail 명령어를 많이 사용하는데 윈도우즈 내장 명령어로는 없어서 답답하다. 그나마 powershell 로 동일하게 사용할 수 있는 명령어가 있다. Get-Content 라는 명령어를 사용하면 된다.

Get-Content [파일 경로] -tail [n] -wait

참고 : Windows의 Powershell 로 Tail 사용하기


Windows의 Powershell 로 Tail 사용하기

일반적으로 많이 사용하던 WinTail 대신에 윈도우에서 제공하는 Powershell로 구현할 수 있다. 사실 한글이 깨지는 경우가 있거나 다른 프로세스가 사용한다는 에러메세지를 많이 접하던 나의 경우

blog.miyam.net


728x90

원격 데스크톱 사용중에 Ctrl + Alt + Del 을 입력하면 로컬 PC 에 적용된다. 원격 데스크톱 PC 에 입력하려면 Ctrl + Alt + End 를 입력하면 된다.

하지만 여러개의 터미널을 거쳐서 접근한 상태라면 Ctrl + Alt + End 는 첫번째 데스크톱에 적용된다. 이 때 고정키를 사용하면 된다.

윈도우즈 10 에서 설정 > 키보드에서 '고정 키 사용'을 켠 후 Ctrl > Alt > Del 을 순서대로 누르면 된다.

또 다른 방법으로 화상 키보드를 이용하는 방법이 있다.

윈도우 실행 창에서 osk 입력해서 화상 키보드를 띄운다. 키보드로 Ctrl + Alt 를 누른 상태에서 화상 키보드의 Del 을 누르는 방식이다.

출처
원격 데스크톱 환경에서 Ctrl + Alt + Del 입력하는 방법


원격 데스크톱 환경에서 Ctrl + Alt + Del 입력하는 방법

원격 데스크톱 환경에서 Ctrl + Alt + Del 입력하는 방법 아래 화면과 같이 AD 조인된 환경에서 사용자가 자신의 Domain 계정 패스워드를 만료되기 전에 미리 변경하기 위해서는 Ctrl + Alt + Del 키를 입력

www.snoopybox.co.kr

원격 데스크톱 세션에서 Ctrl + Alt + Delete 보내기


원격 데스크톱 세션에서 Ctrl-Alt-Delete 보내기

원격 데스크톱은 다른 PC에 원격으로 연결하여 실제로 콘솔에있는 것처럼 관리 할 수있는 멋진 작은 창 기능입니다.

kr.tipsandtricks.tech


728x90

윈도우 서비스를 SYSTEM 계정으로 돌리는데 설정을 위해 응답이 필요하다면 골치 아파진다.

관리자 권한이 필요하면 메뉴에서 '관리자 권한으로 실행'을 선택하거나 runas 를 통해 할 수 있는데 SYSTEM 계정은 애매하다.

검색해보니 PsExec 를 이용하면 SYSTEM 계정으로 프로그램을 실행할 수 있었다. 

마소 홈페이지에서 PsExec 가 포함된 PsTools 를 다운받자. 링크 


PsExec - Windows Sysinternals

Execute processes on remote systems.

docs.microsoft.com


다운받은 파일을 적절한 곳에 압축을 풀자.

관리자 권한으로 명령 프롬프트(cmd.exe) 를 실행하자.

PSTools 압축을 푼 폴더에서 아래와 같이 PSExec 를 실행하면 SYSTEM 계정의 명령창을 볼 수 있다. 

> psexec -i -s -d cmd

각 옵션은 다음과 같은 의미다.

-i Run the program so that it interacts with the desktop of the specified session on the remote system. If no session is specified the process runs in the console session.
-s Run the remote process in the System account.
-d Don't wait for process to terminate (non-interactive).


psexec 최초 실행시에는 동의 창이 뜬다. Agree 를 눌러 동의를 표시하자.

PID 10556 인 새 명령창이 뜨는데 작업 관리자를 통해 보면 SYSTEM 계정으로 실행된 것을 확인할 수 있다.

참고
- How to Run Programs as SYSTEM  
- Lai Go's Blog - CMD 프롬프트를 SYSTEM 사용자 권한으로 실행

728x90

SQL Server 접근할 때  connection string 이 필요하다. 로컬 작업할 때는 별도 id / password 가 아니라 로그인한 계정을 그대로 사용하고 싶은데 이 때 Trusted Connection 를 이용한다. OLE DB Driver 를 사용할 때는 아래와 같은 connection string을 사용했다.

Provider=MSOLEDBSQL; Server=myServerAddress; Database=myDataBase; Trusted_Connection=yes;

.net client 에서는 위 connection string 이 안 먹혀서 지원이 안되나 싶었는데 알고보니 connection string이 달랐다.

Server=myServerAddress; Database=myDataBase; Trusted_Connection=True;

.net client 에서는 yes 가 아닌 True 라고 적어줬어야 했다. 

참고 : SQL Server connection strings


SQL Server connection strings - ConnectionStrings.com


www.connectionstrings.com


728x90

+ Recent posts